


")
Are you on the lookout for a simple manner to make a banner to your WordPress web site?
A banner can spotlight the merchandise, providers, or information updates supplied by your web site. It can enhance consumer engagement, increase your click-through price, and encourage guests to take motion.
In this text, we’ll present you the way to simply make a banner to your WordPress web site.

What Is a Website Banner?
A banner is a graphical show that stretches excessive, backside, or aspect of a WordPress website. It usually consists of a model identify and brand, together with different visible parts, to promote a particular product, service, or occasion.
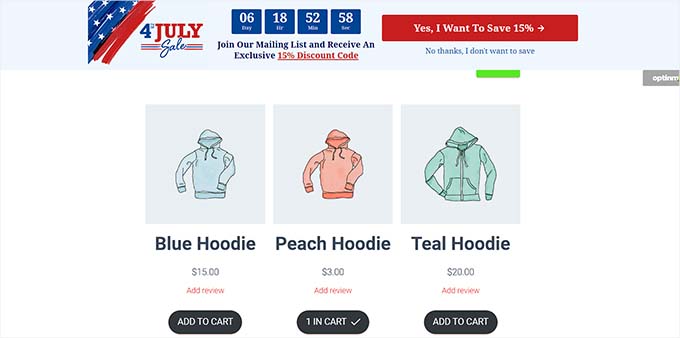
For instance, if an online store has simply introduced a sale, then it may well present a banner on the prime of its pages to inform new guests concerning the promotion and encourage them to make a buy.
A well-designed banner could make a sturdy impression and invite guests to discover the remainder of your web site. Plus, banners may also be used to promote affiliate products, enhance model consciousness, build an email list by encouraging guests to join your e-newsletter, and drive visitors to different pages in your web site.
You also can use banners to promote your social media accounts and encourage guests to observe or like your pages.
What Is the Best Website Banner Size?
The excellent web site banner dimension is determined by the structure and particular advertising targets of your WordPress blog.
For instance, if you need to show a rectangular and skinny banner on the prime of the display screen, then you need to use the Large Leaderboard dimension, which is 970 x 90.
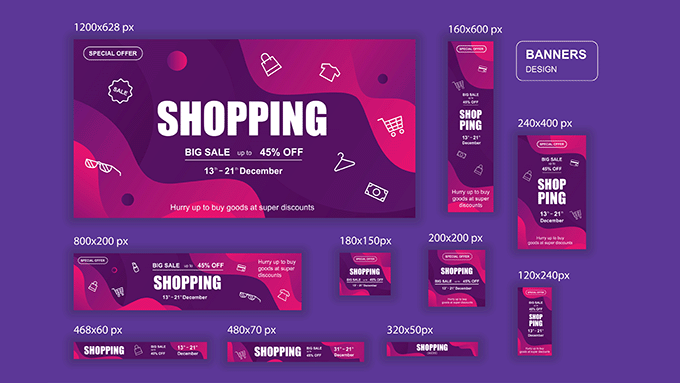
Some of the opposite well-liked and most-used banner sizes embody:
- Medium Banner: 300 x 250
- Leaderboard: 728 x 90
- Wide Skyscraper: 160 x 600
- Half-Page: 300 x 600
- Large Leaderboard: 970 x 90
- Billboard: 970 x 250
- Large Rectangle: 326 x 280
- Vertical Banner: 120 x 240
- Full Banner: 468 x 60
- Half Banner: 234 x 60
If you need to present a banner for an occasion within the sidebar, then you need to use the Wide Skyscraper or Half-Page banner sizes. Similarly, you can too use the Medium banner dimension to show a square-shaped banner in your web page.
If you’re looking to show advert banners, then it’s your decision to see our newbie’s information on the highest-performing Google AdSense banner sizes and formats for WordPress.
Having mentioned that, let’s see how one can simply make a banner in your WordPress web site. For this tutorial, we’ll cowl three strategies to make a banner, and you need to use the hyperlinks under to leap to the strategy of your selection:
Method 1: Make a Website Banner Using OptinMonster (Recommended)
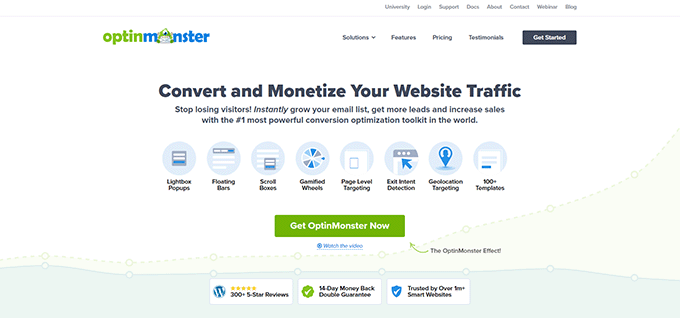
OptinMonster is the best WordPress banner plugin available on the market that permits you to simply create floating bar and popup banners to your web site.
It is the perfect conversion optimization and lead generation tool that helps you flip web site guests into subscribers and clients.
Plus, a lot of OptinMonster’s banner templates have optin fields that permit you to accumulate the names, e mail addresses, and cellphone numbers of your web site guests.
Step 1: Install OptinMonster on Your Website
First, you have to to join an OptinMonster account. To do that, merely go to the OptinMonster web site and click on on the ‘Get OptinMonster Now’ button to arrange an account.
After that, you might have to set up and activate the free OptinMonster plugin in your WordPress web site. For detailed directions, it’s your decision to see our newbie’s information on how to install a WordPress plugin.
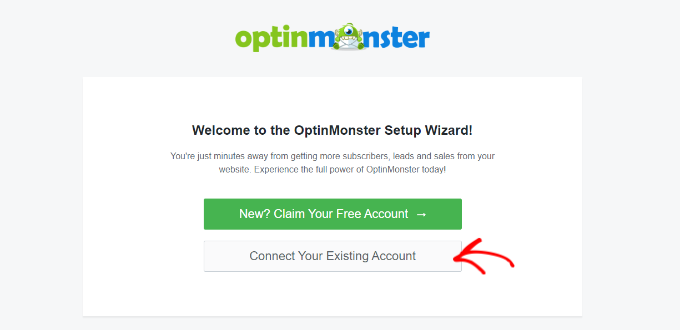
Upon activation, the OptinMonster setup wizard will open in your WordPress admin panel.
From right here, you could click on the ‘Connect Your Existing Account’ button to join your WordPress web site to your OptinMonster account.
This will open up a new window in your laptop display screen.
From right here, you might have to click on the ‘Connect to WordPress’ button to transfer forward.

Step 2: Create and Customize Your Banner
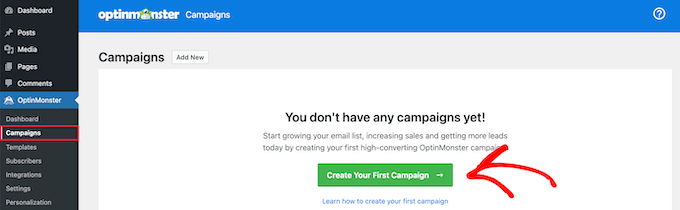
Now that you’ve got linked your WordPress account with OptinMonster, head over to the OptinMonster » Campaigns web page from the WordPress admin sidebar.
From right here, you want to click on on the ‘Create Your First Campaign’ button to begin creating your web site banner design.
This will direct you to the ‘Templates’ web page, the place you can begin by selecting a marketing campaign sort.
For instance, if you need to present your banner as a bar on the prime of the display screen, then you may choose the ‘Floating bar’ marketing campaign. Similarly, you may choose the ‘Popup’ marketing campaign sort to show your banner as a popup.
After that, additionally, you will want to choose a template for the marketing campaign you selected.
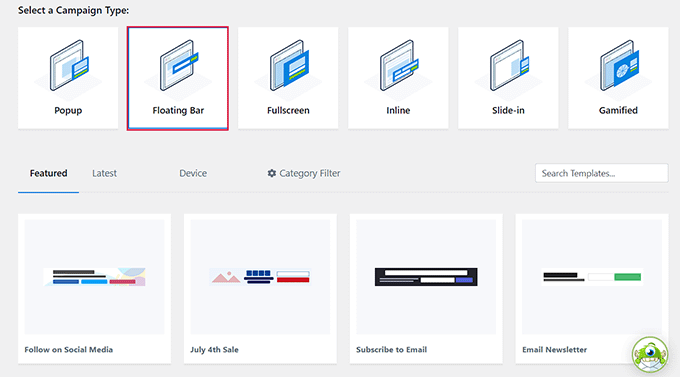
For this tutorial, we might be selecting a template for the ‘Floating bar’ marketing campaign sort.
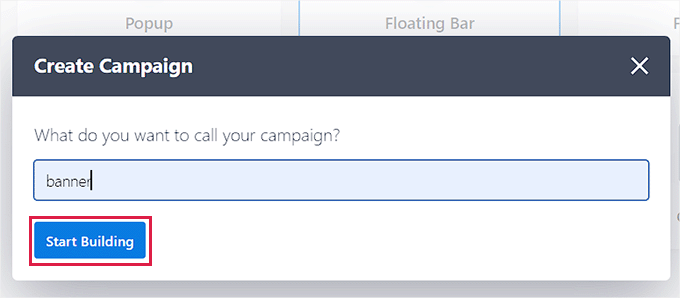
Next, you’ll be requested to give a identify for the marketing campaign that you’re creating.
Simply sort a identify of your selection and click on the ‘Start Building’ button to transfer ahead.
This will launch the OptinMonster drag-and-drop interface in your display screen, the place you can begin customizing your banner. From right here, you may drag and drop fields of your selection from the sidebar on the left onto the banner.
For instance, if you need to add social media icons to your banner to enhance your followers, then you may drag and drop the Social Media block from the left sidebar.
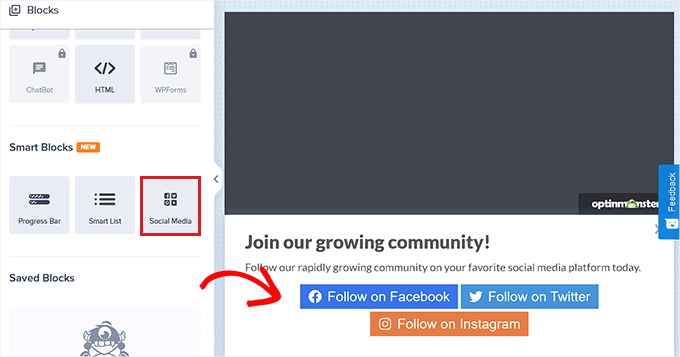
After that, simply click on on the block to open its settings within the left column.
From right here, you may change the button title, add your social media URL, and even change your social media platform from the dropdown menu.
You also can add different blocks to show movies, photos, textual content, or CTAs in your web site banner design.

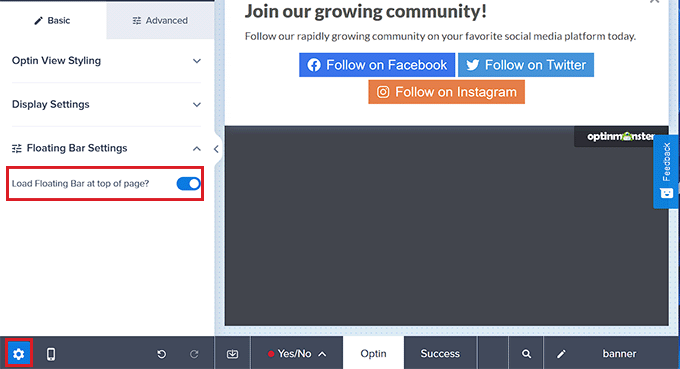
After that, you want to choose the place of your banner.
By default, the OptinMonster floating bar is displayed on the backside of your web site display screen when you begin scrolling.
However, you may simply change this setting by clicking on the ‘Settings’ icon on the backside of the sidebar on the left.
This will open up settings within the left column, the place you could develop the ‘Floating Bar Settings’ tab. From right here, merely toggle the ‘Load Floating Bar on the prime of the web page?’ change to show the banner on the prime.
Step 3: Add Triggers for Your Banner
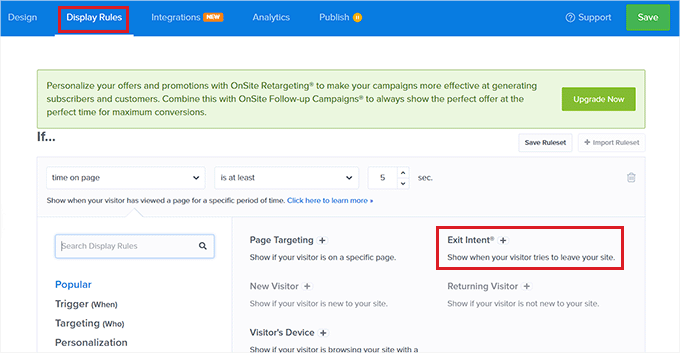
Once you might have designed your banner, change to the ‘Display Rules’ tab on the prime. From right here, you may add guidelines to your banner show.
Remember that you just solely want to change to this tab if you need to add a particular show set off to your banner. Otherwise, you may skip to the following step.
For instance, if you want to present your banner when the consumer is about to depart your web site, you then want to select the ‘Exit Intent’ choice.
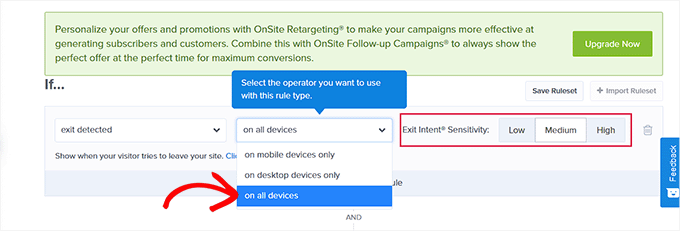
Once you might have performed that, simply choose the ‘On all gadgets’ choice from the dropdown menu within the center. If you would like to use this show rule for cell gadgets solely, then you can too select that choice.
After that, choose the Exit Intent Sensitivity in accordance to your liking and click on the ‘Next Step’ button.
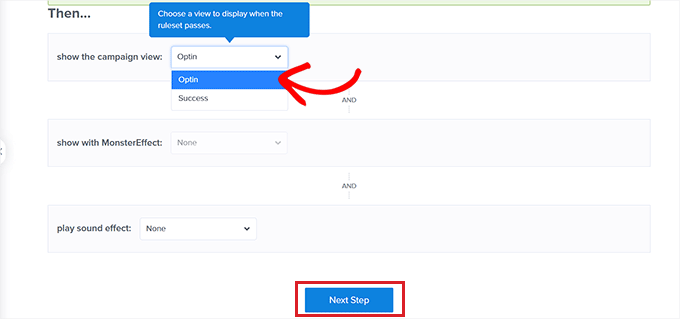
This will take you to a new display screen. Here, you want to ensure that the ‘Optin’ choice is chosen for the ‘Show the marketing campaign view’ dropdown menu.
Once you might have performed that, merely click on the ‘Next Step’ button.
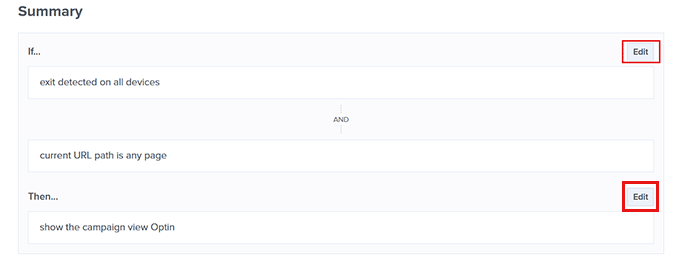
Your show rule for the banner will now be proven on the display screen.
If you need to change one thing right here, then you may click on the ‘Edit’ button to repair it.
Step 4: Publish Your Banner
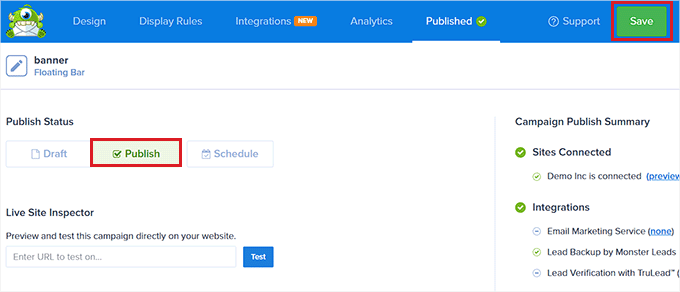
You can now change to the ‘Publish’ tab on the prime and click on the ‘Save’ button within the prime proper nook of the display screen.
After that, merely click on on the ‘Publish’ button to show the banner in your web site.
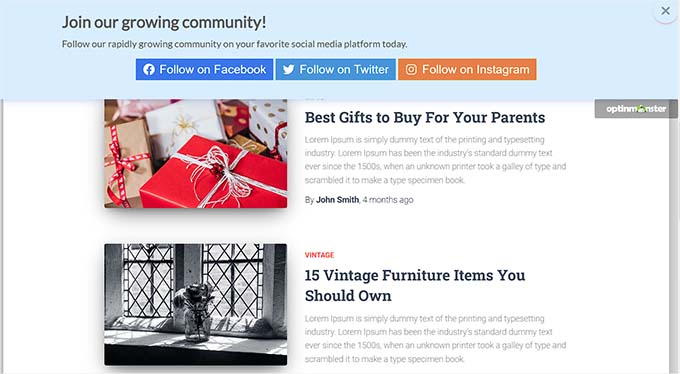
Now go to your web site to see the banner on the prime of your display screen.
This is what it regarded like on our demo web site.
Method 2: Make a Website Banner Using Canva (Free)
If you need to make a web site banner totally free, then this technique is for you.
Canva is a well-liked web-based instrument that permits you to create all types of graphics, together with banners, logos, posters, e-book covers, and extra. It additionally presents a free model that you need to use to create a web site banner design.
Step 1: Create a Canva Account
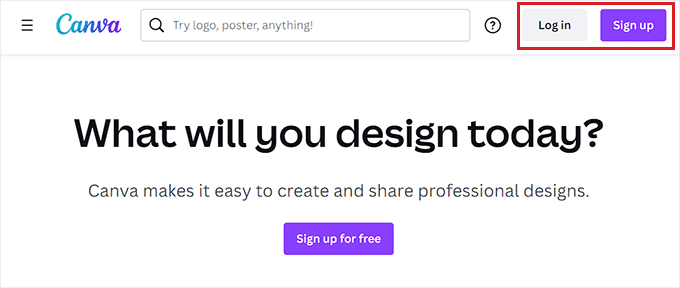
First, you have to to go to the Canva website and click on on the ‘Sign Up’ button to create an account.
If you have already got a Canva account, then you may merely log in.
Upon account creation, you’ll be taken to your Canva account dwelling web page.
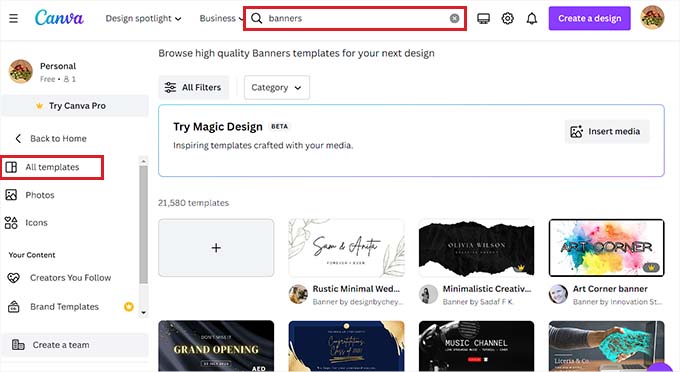
From right here, you want to change to the ‘Templates’ tab from the left column after which seek for banner templates utilizing the search field on the prime.
This will show all of the banner templates accessible in Canva. However, a few of these templates could also be locked as a result of they’re paid options.
Step 2: Design Your Website Banner
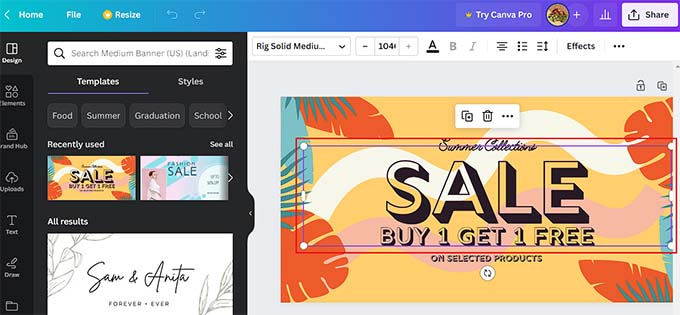
Once you choose a template, Canva’s design interface might be launched on the display screen.
From right here, you may customise your banner template in accordance to your liking. You can change the present content material within the template by clicking on the blocks and including your personal textual content.
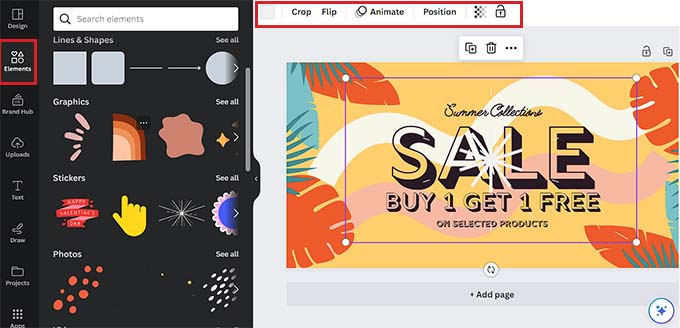
You may even add completely different graphical parts like stickers, pictures, and movies by switching to the ‘Elements’ tab within the left column.
Upon including a component, you may additional change its animation, place, and transparency from the menu on the prime.
You also can add media information from your personal laptop by switching to the ‘Uploads’ tab from the left column.
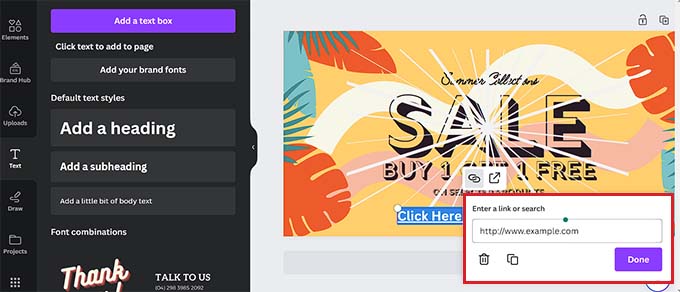
To add some textual content to your banner, merely change to the ‘Textbox’ tab from the column on the left.
Once there, you need to use default textual content kinds or completely different font combinations to add some content material to your banner.
You may even add a call to action with a hyperlink by choosing the textual content utilizing your mouse. This will show a hyperlink icon on the prime of the textual content.
Simply click on on that icon and duplicate and paste the hyperlink you need to add.
After that, click on the ‘Done’ button to reserve it.
Step 3: Get an Embed Code for the Banner
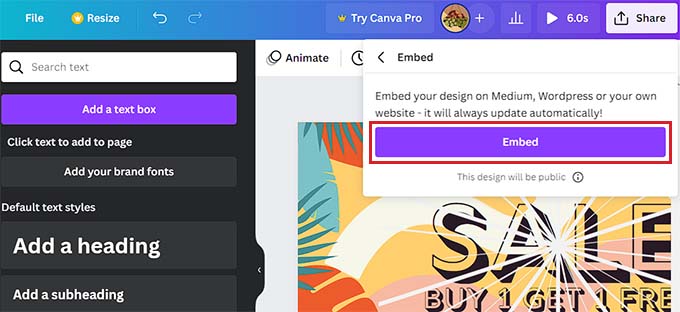
Once you’re glad together with your banner customization, simply click on the ‘Share’ button within the prime proper nook of the display screen.
This will open up a immediate menu the place you could choose the ‘More’ choice on the backside.
This will take you to the ‘All Options’ menu, the place you might have to choose the ‘Embed’ choice.
Once you try this, a new immediate will open up on the display screen. From right here, merely click on the ‘Embed’ button.
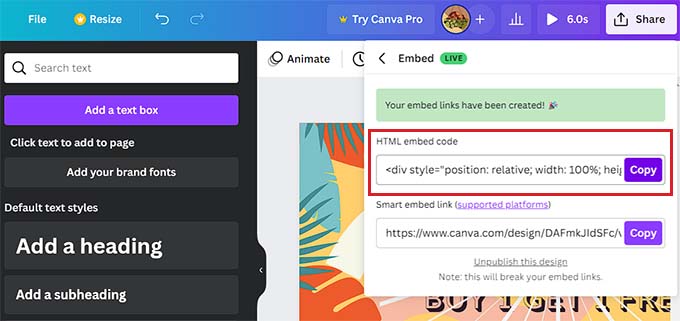
Canva will now create an HTML embed code for you.
Once it’s displayed on the display screen, click on the ‘Copy’ button beneath the ‘HTML embed code’ choice.
Step 4: Add the HTML Embed Code in WordPress
You can now show your banner in your WordPress web page, put up, or sidebar in accordance to your liking. For this tutorial, we might be displaying our banner on a WordPress web page.
First, you want to open the web page or put up the place you need to add the banner.
Once there, click on the ‘+’ button within the prime left nook of the display screen to discover and add the Custom HTML block to the web page.
Once you might have performed that, merely paste the embed code you copied into the block.
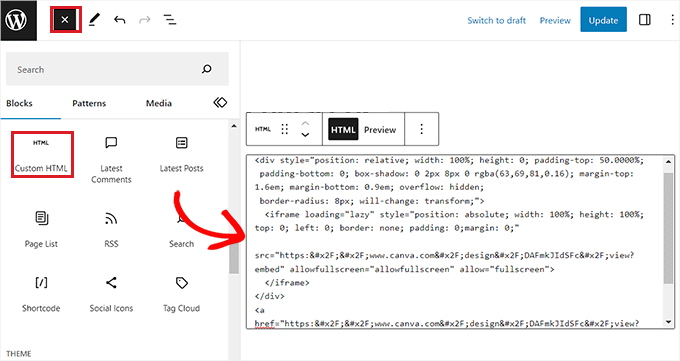
Finally, click on the ‘Update’ or ‘Publish’ button to save your modifications.
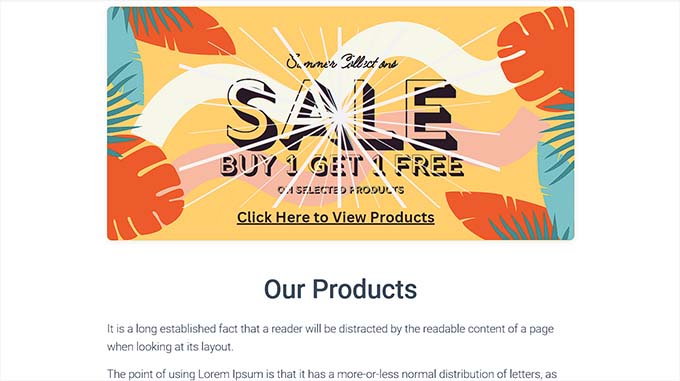
Now go to your web site to see the WordPress banner in motion.
Method 3: Make a Website Banner Using Thrive Leads
You also can create a web site banner utilizing Thrive Leads. It’s a well-liked WordPress popup plugin utilized by over 114,000+ web sites.
With Thrive Leads, you may design banners that may allow you to seize leads in your WordPress web site and grow your email list.
Step 1: Install Thrive Leads on Your WordPress Website
First, you have to to go to the Thrive Themes web site and join an account. Once you might have performed that, head over to your member dashboard.
From right here, go forward and click on the ‘Download and set up the Thrive Product Manager plugin’ hyperlink.
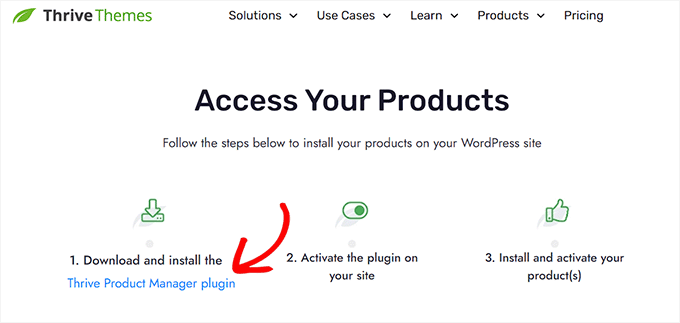
Next, you want to go to your WordPress web site to set up and activate the Thrive Product Manager plugin. For detailed directions, it’s your decision to see our step-by-step information on how to install a WordPress plugin.
Upon activation, head over to the Product Manager tab from the WordPress admin dashboard and click on the ‘Log into my account’ button.
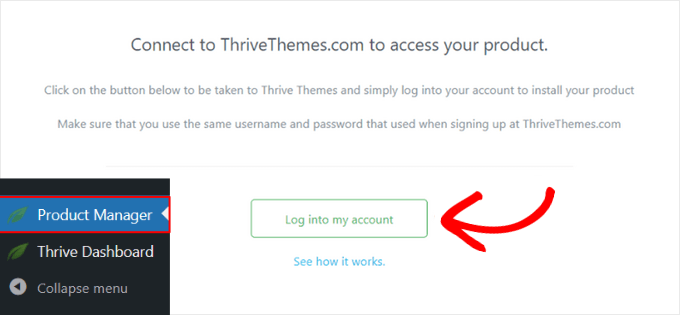
After getting into your login credentials, it is possible for you to to see your Thrive Product Manager dashboard.
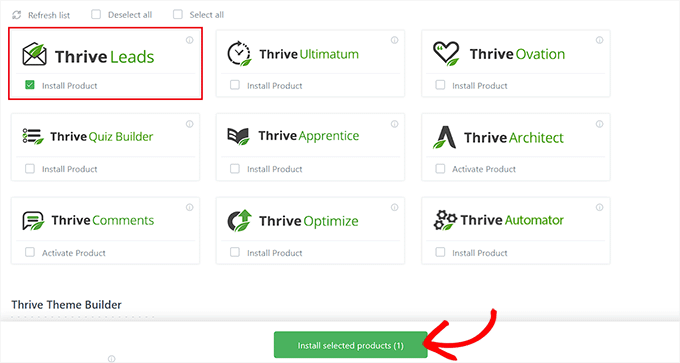
From right here, you may choose the merchandise that you really want to set up and use in your web site. Simply select the ‘Thrive Leads’ plugin and click on the ‘Install selected products’ button.
Step 2: Create a Website Banner
After the plugin set up, you want to go to the Thrive dashboard » Thrive Leads web page from the WordPress admin sidebar.
Once you’re there, simply click on the ‘Add New’ button subsequent to the ‘Lead Groups’ choice.

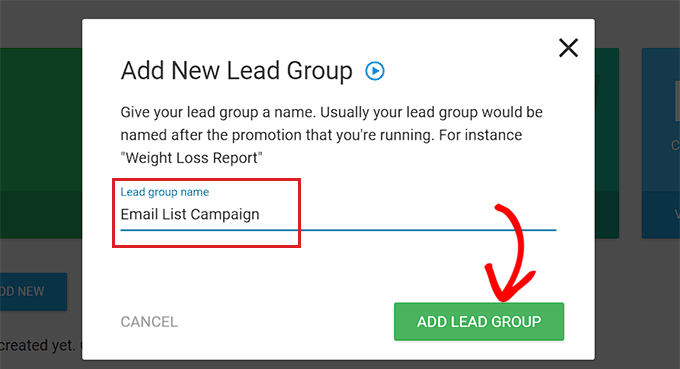
This will show the ‘Add New Lead Group’ popup in your display screen, the place you want to sort a identify for the lead group you’re creating.
Make positive to identify the lead group in a manner that may allow you to establish it.
For occasion, in case you are creating a banner to construct your e mail record, then you may identify your lead group ‘Email List Campaign’.
After that, the lead group you created might be added to the display screen. From right here, you might have to click on the ‘Add New Type Of Opt-In Form’ button.
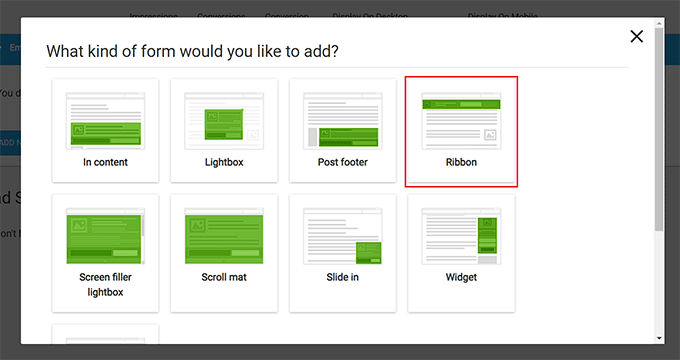
This will open a new immediate the place you could select the kind of banner you prefer to to create.
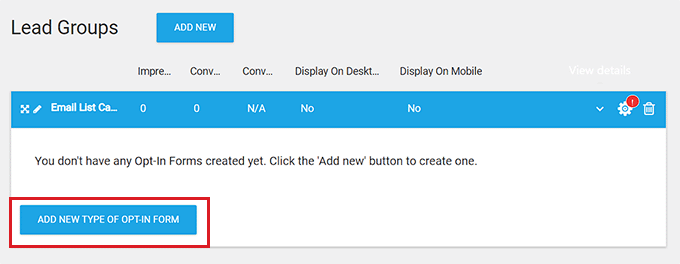
You can create a slide-in, ribbon, widget, in-content, lightbox, or scroll mat banner in accordance to your liking.
These banners might be like a kind as they’ll accumulate information out of your customers, together with email addresses, cellphone numbers, and extra.
For this tutorial, we might be creating a ribbon banner for our web site.
Upon selecting a web site banner design sort, the immediate will robotically disappear from the display screen.
Now, to open your lead group dashboard, you could click on the ‘Add’ button in the appropriate nook of your Lead Groups tab.
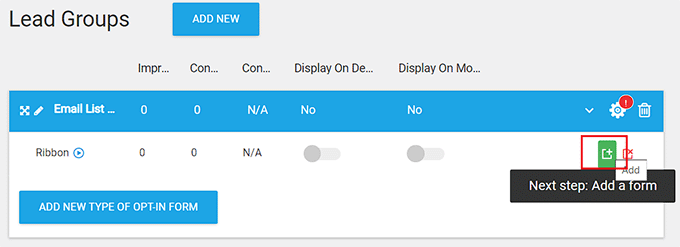
This will take you to your Lead Groups dashboard, the place all of the varieties and lead reviews for the group might be displayed after your marketing campaign goes reside.
For instance, if you need to create a banner to seize e mail addresses, then all of the consumer data you accumulate by means of the banner might be displayed right here.
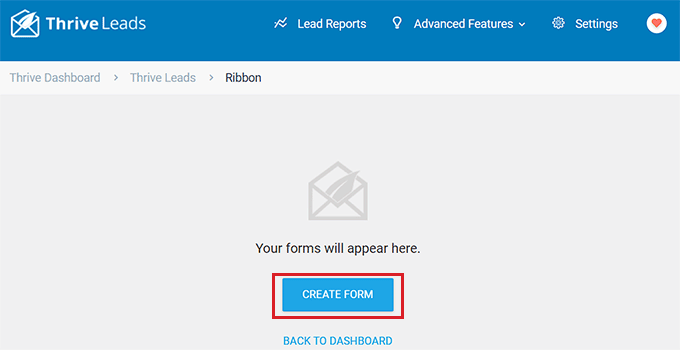
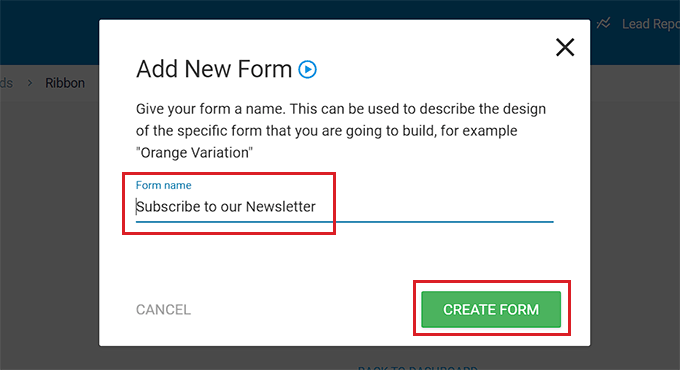
For now, you simply have to click on the ‘Create Form’ button to begin constructing your banner.
This will open up a new immediate the place you could present a identify for the shape and click on the ‘Create Form’ button.
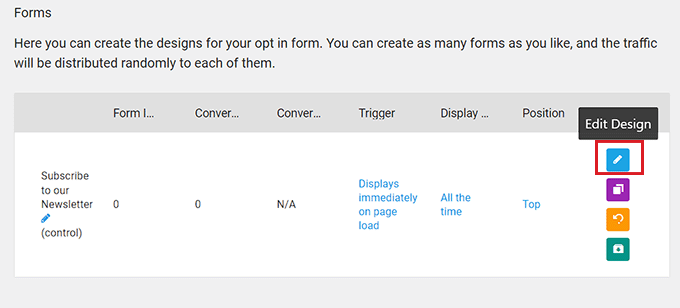
Once your kind has been created, it is going to be displayed in your Lead Groups dashboard.
From right here, you might have to click on the ‘Edit Design’ button in the appropriate nook to begin constructing your banner.
Step 3: Customize Your Website Banner
The Thrive visible editor will now be launched in a new tab in your display screen.
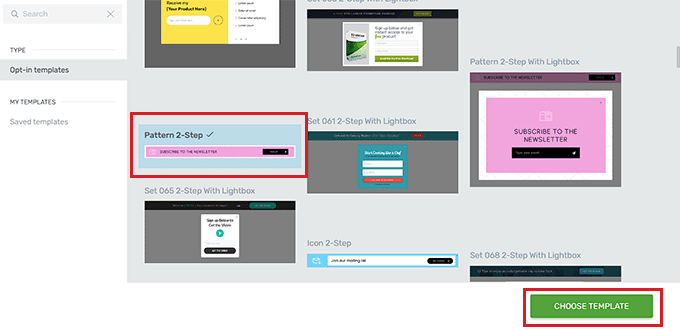
From right here, you can begin by choosing a template to your banner from the ‘Thrive Leads Library’ immediate.
You can then use one of many pre-made template as it’s or additional customise it with the visible editor. Upon making your selection, merely click on the ‘Choose Template’ button to transfer ahead.
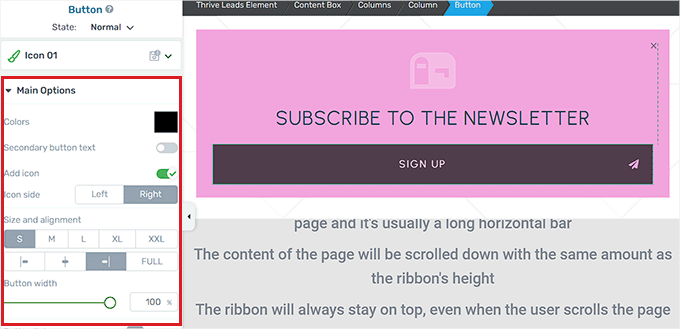
After including a template for a ribbon banner, you may simply customise the weather in it by clicking on each. This will open up the aspect’s settings within the sidebar on the left.
For instance, if you need to change the button coloration in your template, you then merely want to click on on it to open its settings within the sidebar.
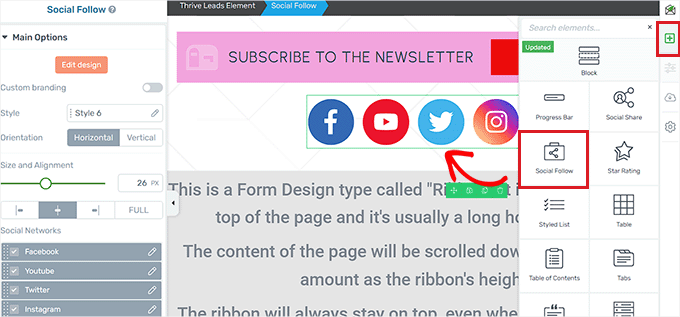
If you need to add a utterly new aspect to your banner, then you can too try this by clicking the ‘+’ icon in the appropriate nook of the display screen.
This will open the ‘Add Elements’ sidebar on the appropriate, the place you may drag and drop parts of your selection onto the banner.
For occasion, if you need to add social media account buttons to your banner, then you should have to drag and drop the Social Follow aspect from the appropriate sidebar.
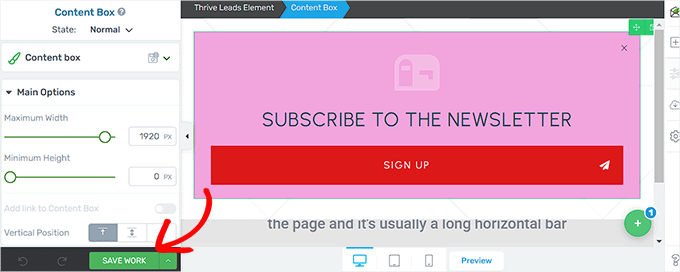
Once you’re glad together with your banner, click on the ‘Save Work’ button within the backside left nook to retailer your modifications.
After that, you want to return to your Lead Groups dashboard.
Step 4: Configure Banner Settings
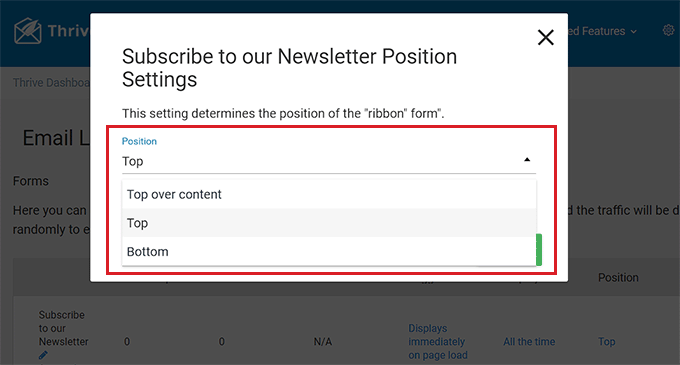
Once you’re again in your dashboard, you may change the place of your banner by clicking on the ‘Position’ choice within the kind row.
This will open the ‘Position Settings’ immediate, the place you may select your most popular banner place from the dropdown menu.
After that, click on the ‘Save’ button.
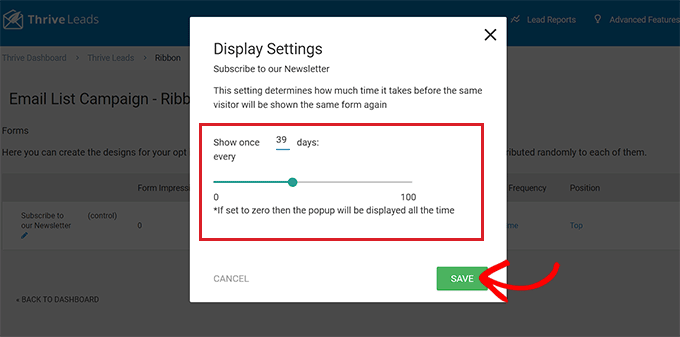
Next, to configure the show frequency of the banner, click on the ‘Display Frequency’ choice within the kind row.
This will open the ‘Display Settings’ immediate, the place you need to use the slider to decide the variety of occasions the banner ought to be displayed on the display screen.
If you retain the quantity 0, then the banner might be displayed always. Upon making your selection, click on the ‘Save’ button to retailer your settings.
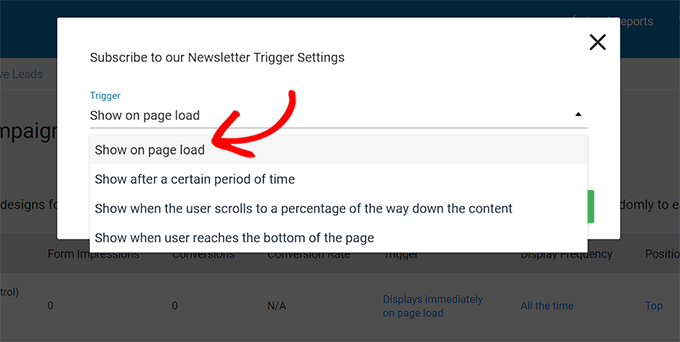
If you need to add a particular set off to your banner show, you then want to click on the ‘Trigger’ choice within the kind row.
This will show the ‘Trigger Settings’ immediate, the place you may select a set off to your banner from the dropdown menu, corresponding to after a sure time period or when a consumer reaches the underside of the web page.
Once you’re performed, click on the ‘Save’ button to save your settings.
Step 5: Publish Your Banner
After you might have configured the banner settings, you want to exit your Lead Groups dashboard and head again to the Thrive Leads dashboard by clicking on the hyperlink on the prime.
Once you’re there, develop your Lead Groups tab and toggle the ‘Display On Desktop’ change to ‘On’. If you additionally need to show your banner on cell gadgets, then you may toggle the ‘Display On Mobile’ change to ‘On’.
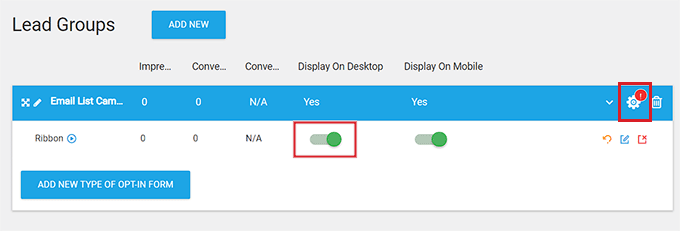
After that, click on the gear icon within the prime proper nook of the Lead Groups tab to open up the show settings.
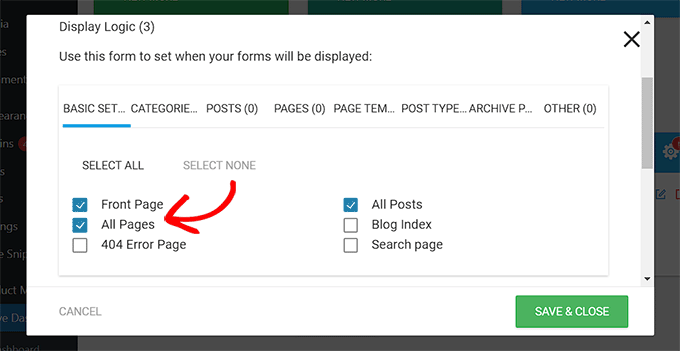
Here, you may choose the web site pages that you really want the banner to be displayed on. For occasion, if you need the banner to present on the prime of all of the pages and posts, then you may examine the field subsequent to these choices.
Finally, click on the ‘Save and Close’ button to save your modifications.
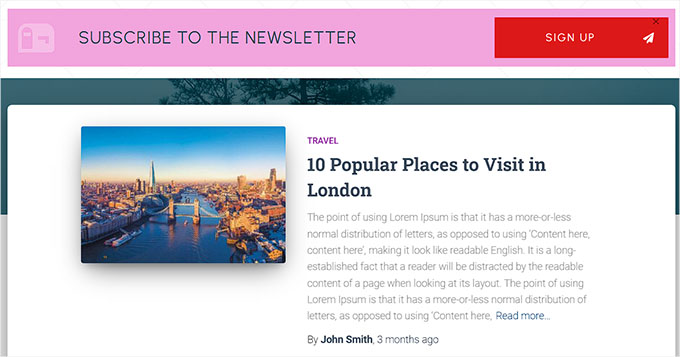
Now, you may go to your web site to take a look at the banner displayed on the prime of the web page.
This is what it regarded like on our demo web site.
We hope this text helped you find out how to simply make a web site banner for WordPress. You may need to see our newbie’s information on how to customize colors on your WordPress website and our prime picks for the best web design software.
If you appreciated this text, then please subscribe to our YouTube Channel for WordPress video tutorials. You also can discover us on Twitter and Facebook.
The put up How to Make a Website Banner (3 Easy Ways) first appeared on WPBeginner.

")
")


