


Do you need to allow buyer monitoring in WooCommerce?
Customer monitoring permits you to supply a customized buying expertise primarily based on buyer habits in your eCommerce retailer.
In this text, we are going to present you the way to simply allow buyer monitoring in WooCommerce with Google Analytics.
Why Enable Customer Tracking in WooCommerce with Google Analytics?
Google Analytics permits you to see the place your guests are coming from and what they do in your web site. In different phrases, it helps you monitor your site visitors sources in addition to user engagement in your web site.
For eCommerce platforms, Google Analytics provides an enhanced eCommerce monitoring characteristic. This permits you to higher perceive customers’ buying and checkout habits. Plus, you possibly can see which merchandise carry out one of the best and monitor your WooCommerce retailer’s gross sales efficiency.
By default, a WooCommerce store permits your clients to create an account or checkout as visitor customers. Creating an account helps the person save their delivery and billing data for quicker checkout subsequent time. It additionally helps you supply clients a customized buying expertise primarily based on their shopping and buying historical past.
Wouldn’t it’s nice for those who may monitor logged-in customers with their person IDs in Google Analytics and likewise see the trail clients took earlier than making a purchase order?
This gives you entry to a treasure trove of data and insights on buyer habits. You can use it to supply a greater on-site expertise and increase your gross sales.
Let’s check out how to simply allow buyer monitoring in WooCommerce. Here are fast hyperlinks that you need to use to leap forward to any part:
Set up Ecommerce Tracking in WordPress with Google Analytics
The greatest manner to arrange WooCommerce buyer monitoring in Google Analytics is utilizing Monsterinsights. It is one of the best Analytics answer for WordPress and helps you arrange monitoring with out enhancing code.
The plugin provides an eCommerce addon, which routinely detects WooCommerces and begins monitoring buyer habits in Google Analytics. It additionally comes with a Customer Journey addon that permits you to see customers’ habits earlier than they make a purchase order.
First, you’ll need to set up and activate the MonsterInsights plugin. For extra particulars, see our step-by-step information on how to install a WordPress plugin.
You will want to be on the ‘Pro’ plan to entry the eCommerce and User Journey addon, which we are going to use for this tutorial. However, there’s additionally a MonsterInsights Lite model you need to use at no cost.
Upon activation, you will note the welcome display and the setup wizard. Simply click on the ‘Launch the Wizard’ button and comply with the on-screen directions.

For detailed directions, see our article on how to install Google Analytics in WordPress.
MonsterInsights additionally helps you arrange Google Analytics 4 (GA4) property by way of its Dual Tracking characteristic. GA4 is the most recent Analytics model, and it’ll quickly substitute Universal Analytics.
If you haven’t created a Google Analytics 4 property, then now could be one of the best time. That’s as a result of, after July 1, 2023, Universal Analytics will sundown and received’t monitor your web site knowledge. Setting up GA4 after the sundown date will imply you’ll have to begin from scratch and received’t have any historic knowledge for comparability.
For extra particulars, please see our information on how to switch to Google Analytics 4 in WordPress.
Install the MonsterInsights eCommerce Addon
Once you’ve configured Google Analytics in your web site, the subsequent step is to set up the eCommerce addon.
You want to go to the Insights » Addons web page out of your WordPress dashboard and navigate to the ‘eCommerce’ addon. Simply click on the ‘Install’ button, and the addon will routinely activate.

Enable Enhanced Ecommerce Tracking in Google Analytics
The subsequent step is to enable eCommerce tracking in Google Analytics. E-commerce monitoring just isn’t enabled by default in your Google Analytics account, and you should have to manually allow it.
First, you’ll want to head over to your Google Analytics account dashboard and click on the Admin possibility.

Next, you want to click on on the ‘Ecommerce Settings’ possibility.
It is positioned beneath the View column.

On the settings web page, click on the slider beneath Enable Ecommerce and Enable Enhanced Ecommerce Reporting to flip it on.
Don’t overlook to click on the ‘Save’ button whenever you’re achieved.

Now, your Google Analytics account will begin exhibiting enhanced eCommerce stories to your WooCommerce retailer.
For extra particulars, please see our information on how to set up WooCommerce conversion tracking.
Enabling User Journey Addon in MonsterInsights
Now that you just’ve arrange WooCommerce monitoring in Google Analytics, the subsequent step is to allow the MonsterInsights Customer Journey addon.
The addon will enable you to see the steps a buyer takes earlier than making a purchase order in WooCommerce. Plus, it additionally exhibits the time it took at every step, the pages a person visited, and extra.
First, you’ll want to go to Insights » Addons out of your WordPress admin panel. Next, navigate to the User Journey addon and click on the ‘Install’ button.
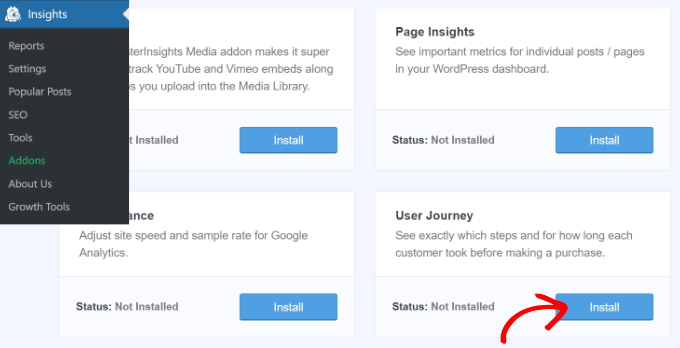
The addon will routinely activate and begin monitoring your WooCommerce buyer’s journey.
Next, you possibly can go to WooCommerce » Orders out of your WordPress dashboard to view the trail your clients took when buying a product.
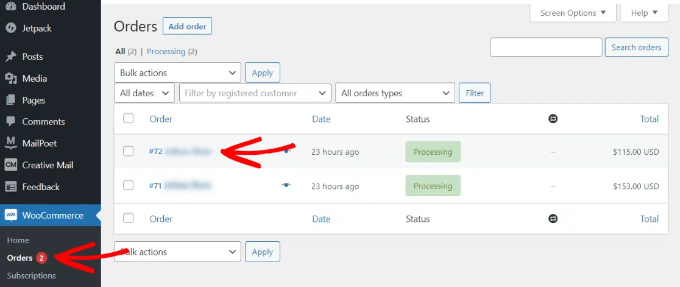
After that, click on on the order for which you’d like to see the person journey.
On the subsequent display, you’ll see the trail a buyer took earlier than shopping for the product. You get to view the pages they visited, the place they clicked, and the way a lot time they spent on a web page.
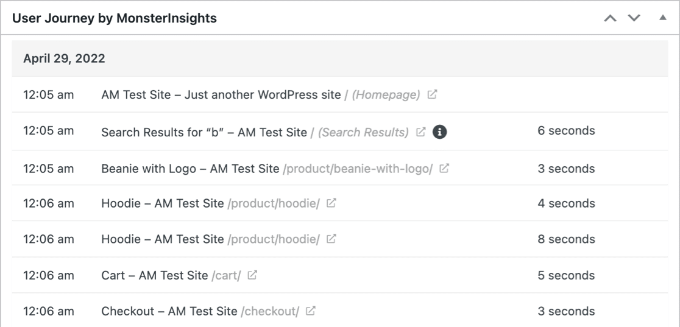
This is basically helpful data to higher perceive your clients. You can see which product categories are performing one of the best and the place clients are exiting your retailer in the course of the buy course of. Using the information, you possibly can then repair these points and optimize your web site for extra conversions.
Enabling User ID Tracking in Google Analytics
While MonsterInsights makes it very simple to monitor clients in your WooCommerce retailer, it additionally tracks WordPress ID monitoring in Google Analytics.
WordPress ID is a novel ID to determine each person in your web site. The person ID is named the ‘Client ID’ in Universal Analytics and the ‘App Instance ID’ in Google Analytics.
Do do not forget that enhanced eCommerce monitoring will allow eCommerce reporting options to your WooCommerce retailer. However, it doesn’t allow person monitoring by default.
Let’s check out how one can allow person ID monitoring in Universal Analytics and Google Analytics 4.
Enabling Customer Tracking in Universal Analytics
To allow particular person buyer monitoring, you want to go to your Google Analytics account dashboard and open the Admin web page.
Now, click on on the ‘Tracking information’ hyperlink beneath the Property column to develop the submenu.
After that, you possibly can click on the User-ID hyperlink that seems under.

On the subsequent web page, you’ll have to evaluate and agree to the User-ID coverage.
Simply click on the ‘I agree to the User-ID Policy’ toggle to flip it on.

From right here, click on on the ‘Next step’ button to proceed.
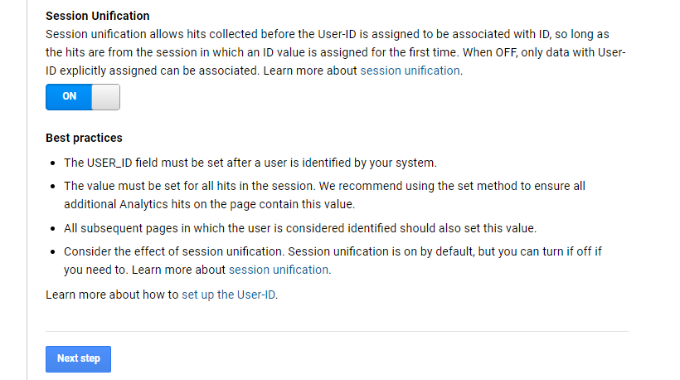
Google Analytics will now ask how you desire to to configure the user-ID monitoring.

Since you’ll be utilizing MonsterInsights, there’s no want to arrange the user-ID monitoring code. The plugin will maintain this for you.
Simply scroll down and click on the ‘Next step’ button to proceed.
Next, you will note details about making a person ID view in Google Analytics.
Go forward and click on the ‘Create’ button.

After that, you can be requested to enter a ‘Reporting View Name’, which will probably be used to show User ID stories.
We advocate together with UserID in the title, so it’s simple to keep in mind which view has UserID monitoring enabled.

There can be an possibility to choose the Reporting Time Zone.
Next, you simply want to scroll down to the underside and click on on the ‘Create view’ button to reserve it.

Enabling Customer Tracking in Google Analytics 4
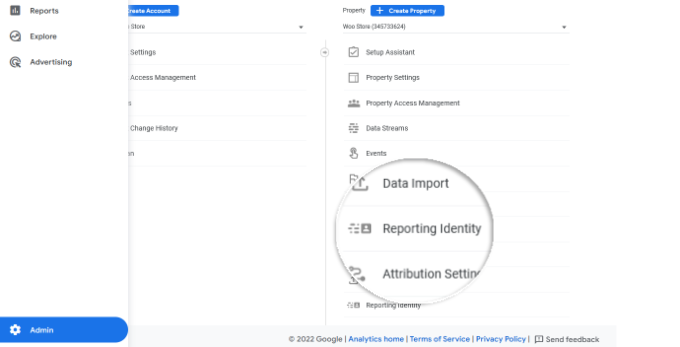
To begin, you’ll want to go to the Admin settings out of your GA4 dashboard and click on the ‘Reporting Identity’ possibility.
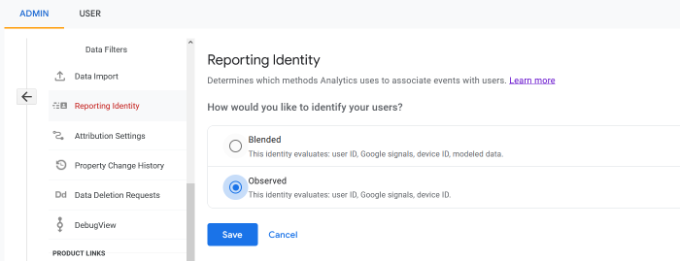
On the subsequent display, you’ll need to choose a manner to determine customers in your online store.
GA4 makes use of a number of methods to determine clients. These embrace person ID, Google alerts, machine ID, and modeled knowledge. For the sake of this tutorial, we’ll choose the ‘Observed’ possibility and click on the ‘Save’ button.
Viewing Customer Tracking Reports in Google Analytics
Now that the whole lot is ready up, Google Analytics will now track all your website customers. It can even give you the chance to monitor logged-in customers with their distinctive WordPress person ID.
View User ID Data in Universal Analytics
To view all of your particular person buyer exercise, you possibly can go to your Universal Analytics account and click on on the Audience » User Explorer menu.

You will see particular person buyer stories with a novel ID assigned to all non-logged-in customers.
To view buyer monitoring stories for logged-in customers in WooCommerce, you want to click on on the Google Analytics brand on the highest left nook of the display.
This will present all of your Google Analytics profiles. You will see your web site profile and beneath ‘All web site knowledge’ you will note the UserID reporting view you created earlier.

Go forward and click on on the UserID reporting view to load it.
Once it’s loaded, you want to click on on the Audience » User Explorer menu. This manner, you will note a logged-in buyer monitoring report the place every person is represented by their WordPress person ID in your web site.

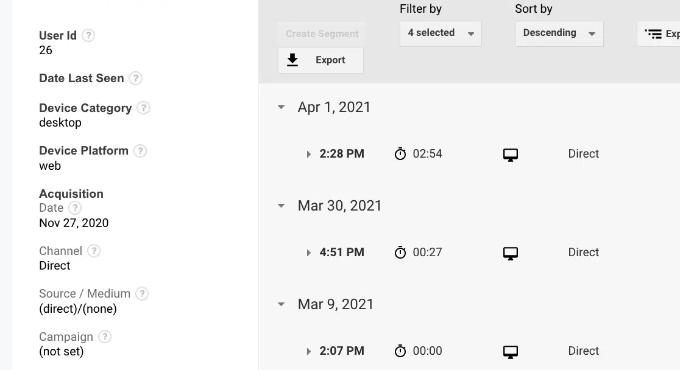
You can click on on the person ID to view a buyer’s particular person monitoring knowledge.
For occasion, the machine class they use, acquisition date, the channel they used to arrive on the web retailer, and extra.
View User ID Data in Google Analytics 4
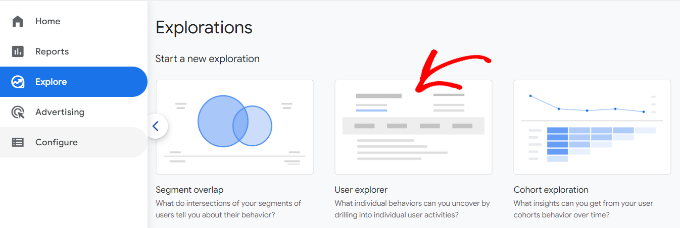
In Google Analytics 4, you’ll want to head to the ‘Explore’ tab from the menu in your left.
Under Explorations, you’ll see totally different report templates. Simply click on the prevailing ‘User explorer’ report.
Next, you’ll see the User explorer report in Google Analytics 4.
One factor you possibly can discover is the Client ID will probably be changed with the App occasion ID.
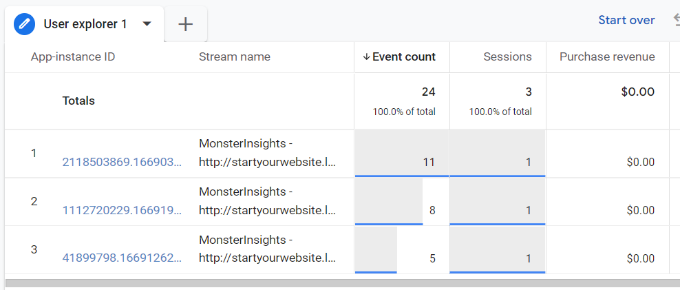
You can click on on any of the app occasion IDs to view extra particulars.
For instance, the report exhibits the full occasions that have been triggered, the placement of the person, the time stamp for every occasion, and extra.

Matching Customer Tracking with Their WordPress Accounts
Now that you just’ve recognized customers in Google Analytics, you possibly can match them with WordPress accounts. This will assist who this buyer is, and how one can create customized provides, emails, or buying experiences for them.
First, you want to word down the client ID you see in your Google Analytics User-ID reporting view.
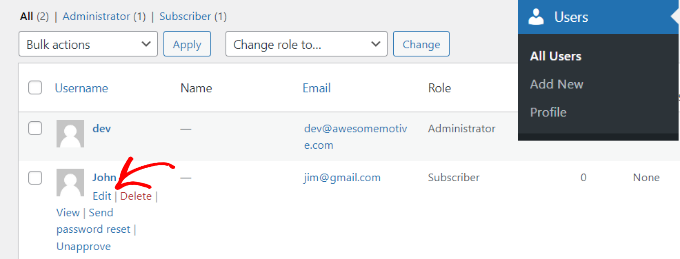
After that, go to your WordPress website’s admin area and click on on the ‘Users’ menu. It will present you a listing of all customers in your WordPress web site.
Next, you possibly can click on the ‘Edit’ hyperlink under any username in the record.
WordPress will now open the person profile for you.
If you look in your browser’s deal with bar you’ll ‘user_id’ parameter in the URL.

Next, you want to substitute the worth subsequent to user_id with the one you copied out of your Google Analytics report and press enter key in your keyboard.
WordPress will now load the person profile related with that specific User ID. You now have the client’s title, username, e-mail deal with, and social media data. You can even monitor their orders, product views, cart exercise, and extra.
We hope this text helped you find out how to allow buyer monitoring in WooCommerce with Google Analytics. You may additionally need to see our knowledgeable choose of the best free WooCommerce plugins to your on-line retailer and how to get a free email domain.
If you appreciated this text, then please subscribe to our YouTube Channel for WordPress video tutorials. You can even discover us on Twitter and Facebook.
The publish How to Enable Customer Tracking in WooCommerce with Google Analytics first appeared on WPBeginner.
")
")


